


Add Featured Posts to WordPress
If you have plenty of posts on your website, you may have run into a problem: it can become hard for users to find the most important content. This not only hurts traffic to those pages; it can also make for a poor user experience.
The solution could be to add a featured posts section to your site. This feature displays a list of your most important content in a dedicated section or widget, enabling visitors to easily find it. You can use it to highlight major posts, a specific post with high traffic, custom post types, important news stories, or any other content you like.
In this article we’ll show you some examples of well-implemented featured posts, and then walk you through three different methods for implementing them on your site. Let’s get started!
Examples of Featured Posts
A featured posts section on your site can be an excellent way to drive traffic to particular articles. It also helps users find the main content on your site more easily, improving their experience.
Featured posts should usually be evergreen ‘pillar content’ that is always relevant and serves the primary purpose of your site. There are exceptions, of course – one might be if you want to feature a recent, high-profile news story. However, in general, you’ll want your featured posts to represent the core content of your site.
A perfect example is the Torque home page, which has a grid of featured posts below the ‘most recent’ section:

Another excellent example is the Yoast SEO blog, which features key posts from several categories at the top of the page:

This helps ensure that users find the content Yoast considers most important right from the start.
Adding Featured Posts to WordPress Using Gutenberg
If you want to add featured posts to your own site, you have several options. The first method is to use the Gutenberg block editor. The process is fairly simple: you’ll be including links in a list or a text block.
Step 1: Add a New Block
First, head to the page you want to display your featured posts on. Click on the + button in the top-left corner of the editor screen to add a new WordPress block:
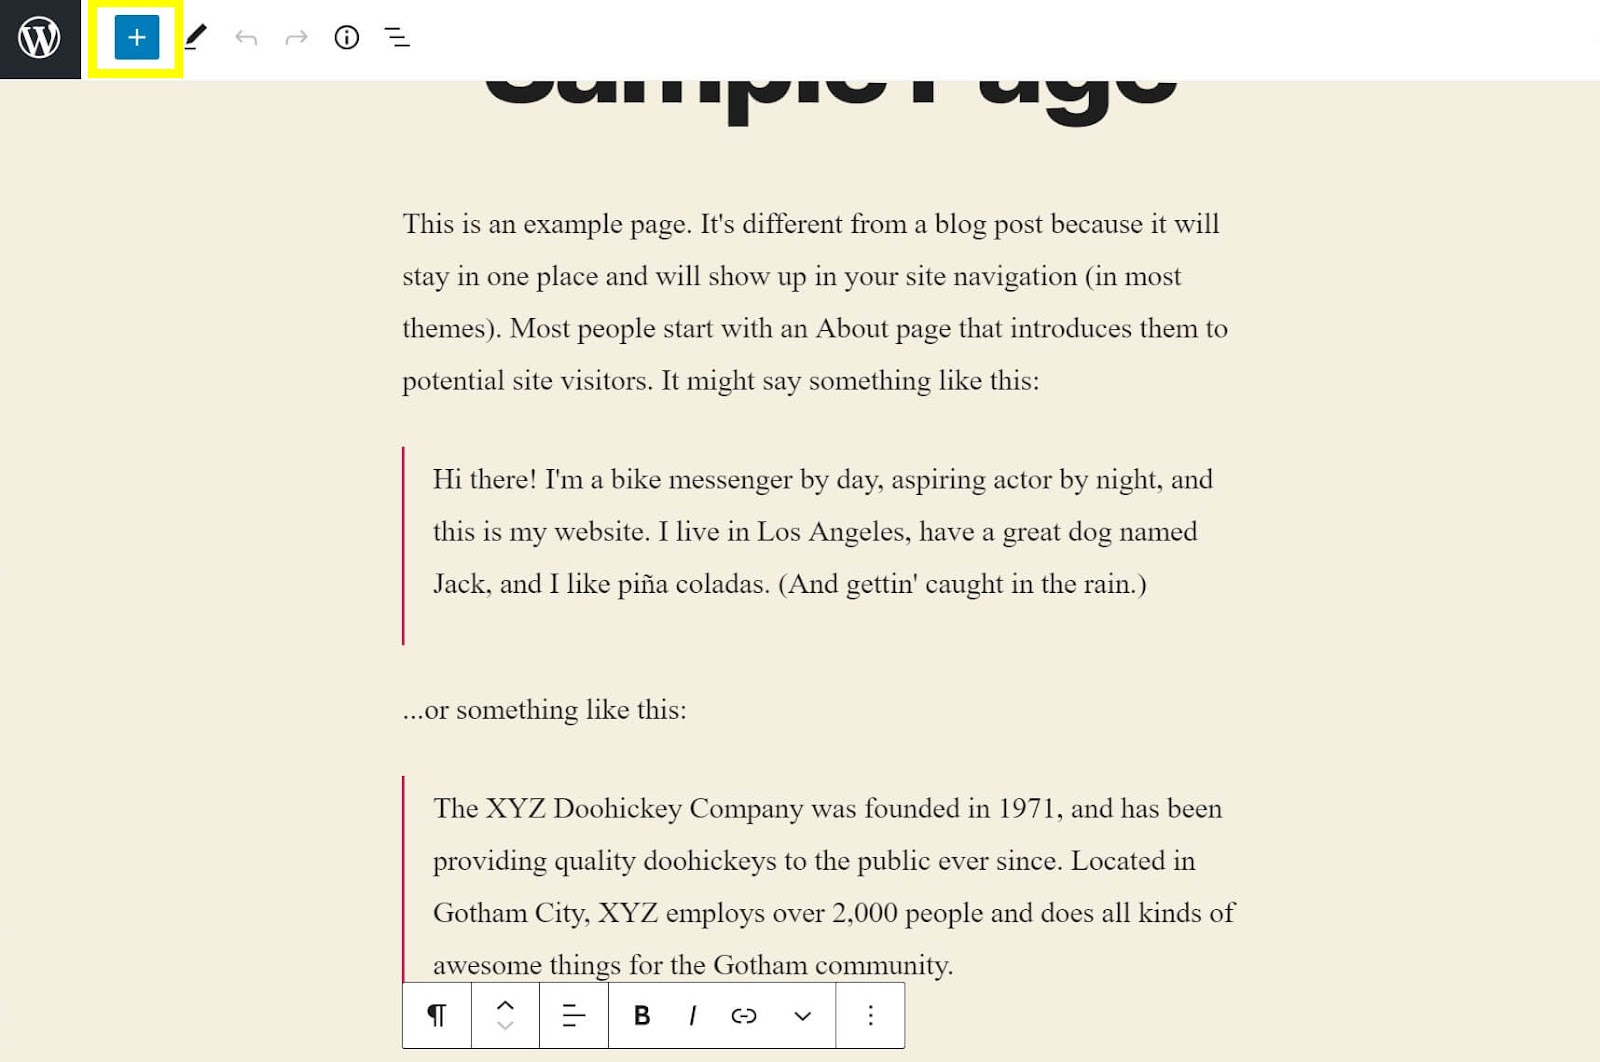
Alternatively, you can hover your mouse over the area of the page where you want to add the block, and select the + icon that appears.
Step 2: Add the List Block & Select the Blog Post You Want to Feature
When you click on that + icon, a list of available blocks will pop up. For a featured posts element, you can choose either the Paragraph block or the List block, depending on how you want your posts to appear. For this example, we’ll go with the List option:

Once the block is added, you can click and drag it to the position you want.
To add your content to the block, simply enter the names of the posts you want to feature. Then you can link the text to your blog post by selecting it and pressing Ctrl +K or Cmd + K:

After that, all you have to do is repeat this process for each post you want to feature.
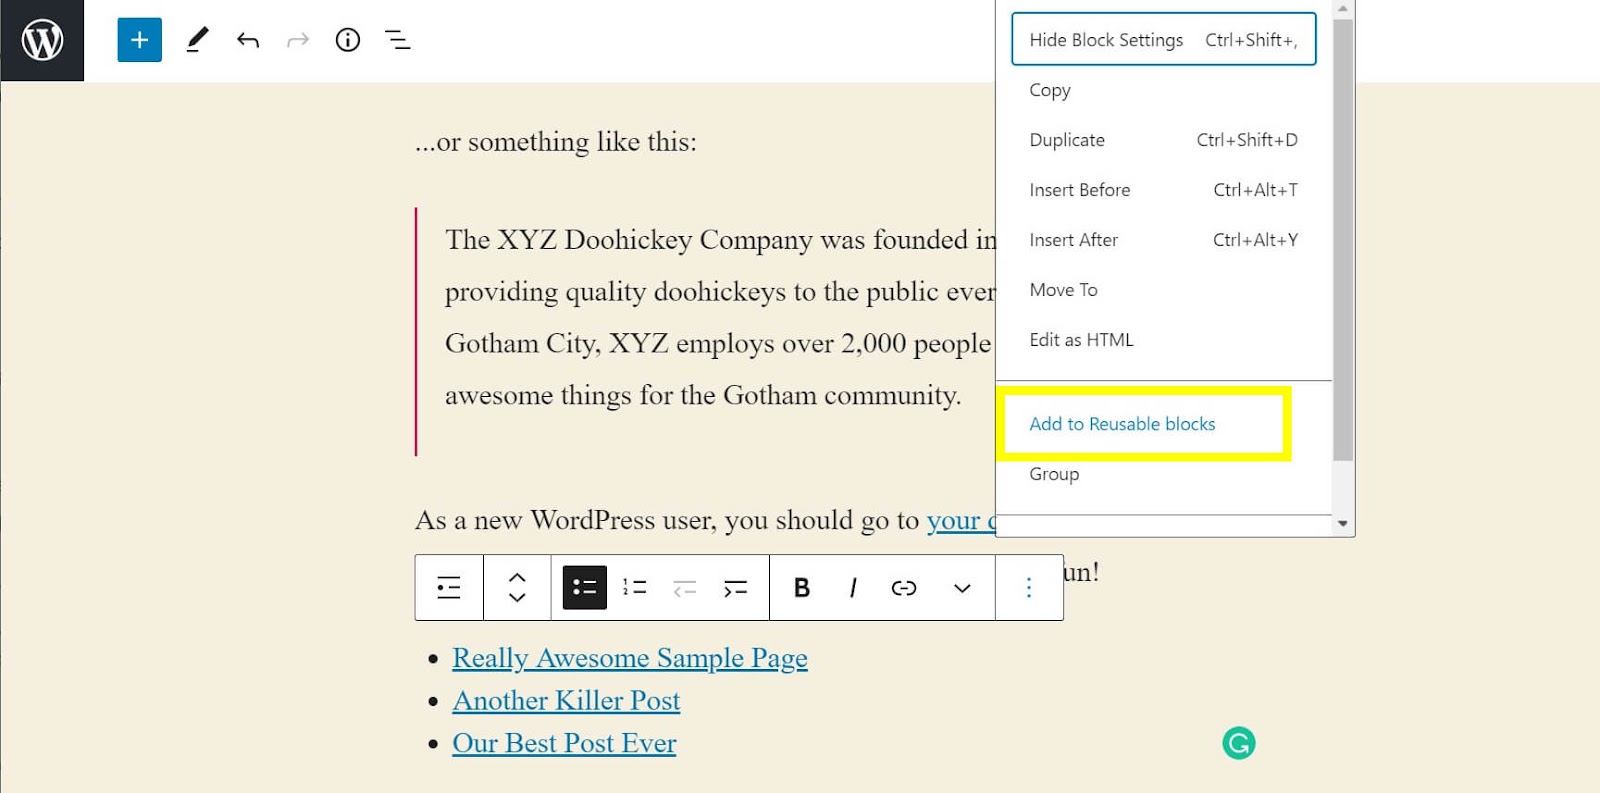
Step 3: Make Your Blocks Reusable (Optional)
At this point, your featured post list is ready to go. However, if you want to be able to reuse the list on other pages without recreating it every time, you can save it as a reusable block.
To do so, click inside the block, then select the three-dot menu and choose Add to Reusable Blocks from the list:
Give the reusable block a name and click on Save. The new reusable block will now appear in the list whenever you add a block to a page. The next time you want to add the featured post list to a page, simply choose this new block from the list.
Adding Featured Posts to WordPress in the Sidebar
If you want your featured posts to appear on every page automatically, you can add the list to a sidebar using a WordPress widget. This process is very similar to using the Gutenberg block: you’ll be using a simple text widget and hyperlinks.
Note: Not every WordPress theme layout has a sidebar section. If yours doesn’t, you can also add this element to any other widget area on your page.
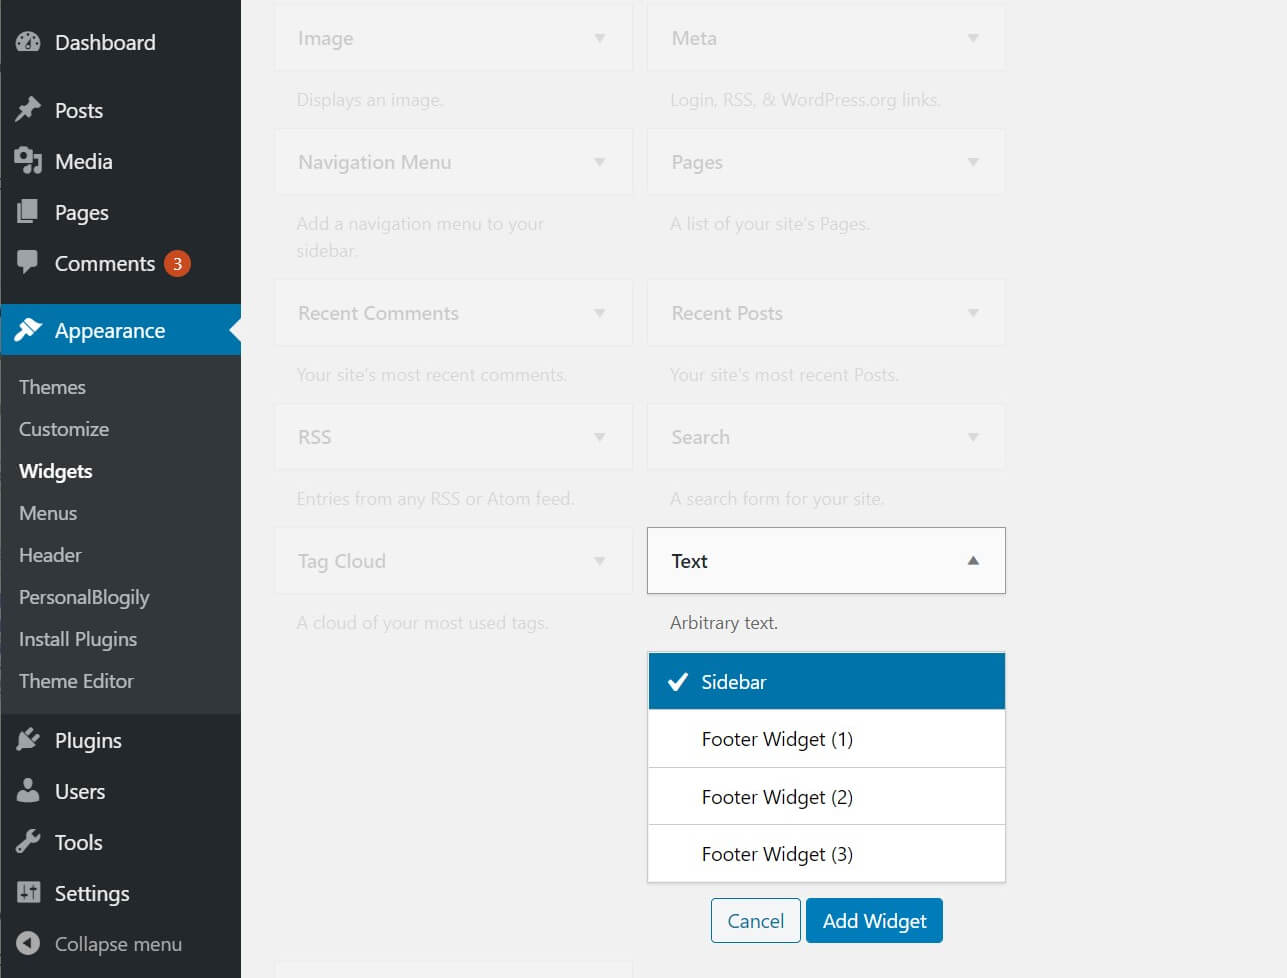
Step 1: Add a Text Widget to Your Sidebar
First, head to your WordPress dashboard and navigate to Appearance > Widgets. Select the text widget option, then choose the area where you want to place it and click on Add Widget:
A new box will appear where you can set the post title and contents of the widget.
Step 2: Add Titles for Your Featured Posts
Next, you can add the titles for the posts you want to feature. You can opt for a plain text or list format:
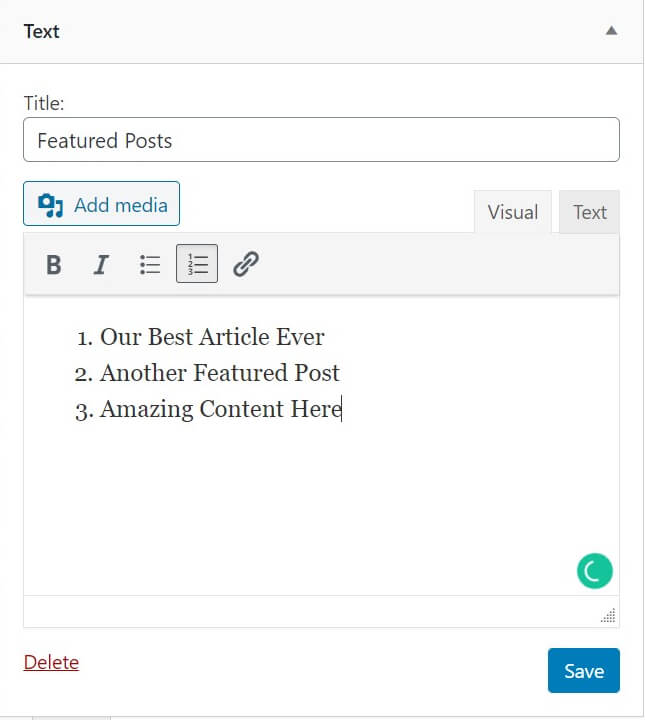
Go ahead and add all the titles for your posts. You can also give the widget a title if you like.
Step 3: Add Links
Finally, select the text you entered and add your links:

As with the Gutenberg block, you can simply search for your post titles when linking, rather than copying and pasting the URLs. With that done, you’ve successfully created your featured posts widget.
Add Featured Posts to WordPress With a Plugin
If you want a different method and a more stylized list of featured posts, you can also use a WordPress plugin to accomplish this task. There are a number of featured post plugin options available, but we’ll use the simple Display Posts plugin, which uses WordPress shortcodes to help you place your list.
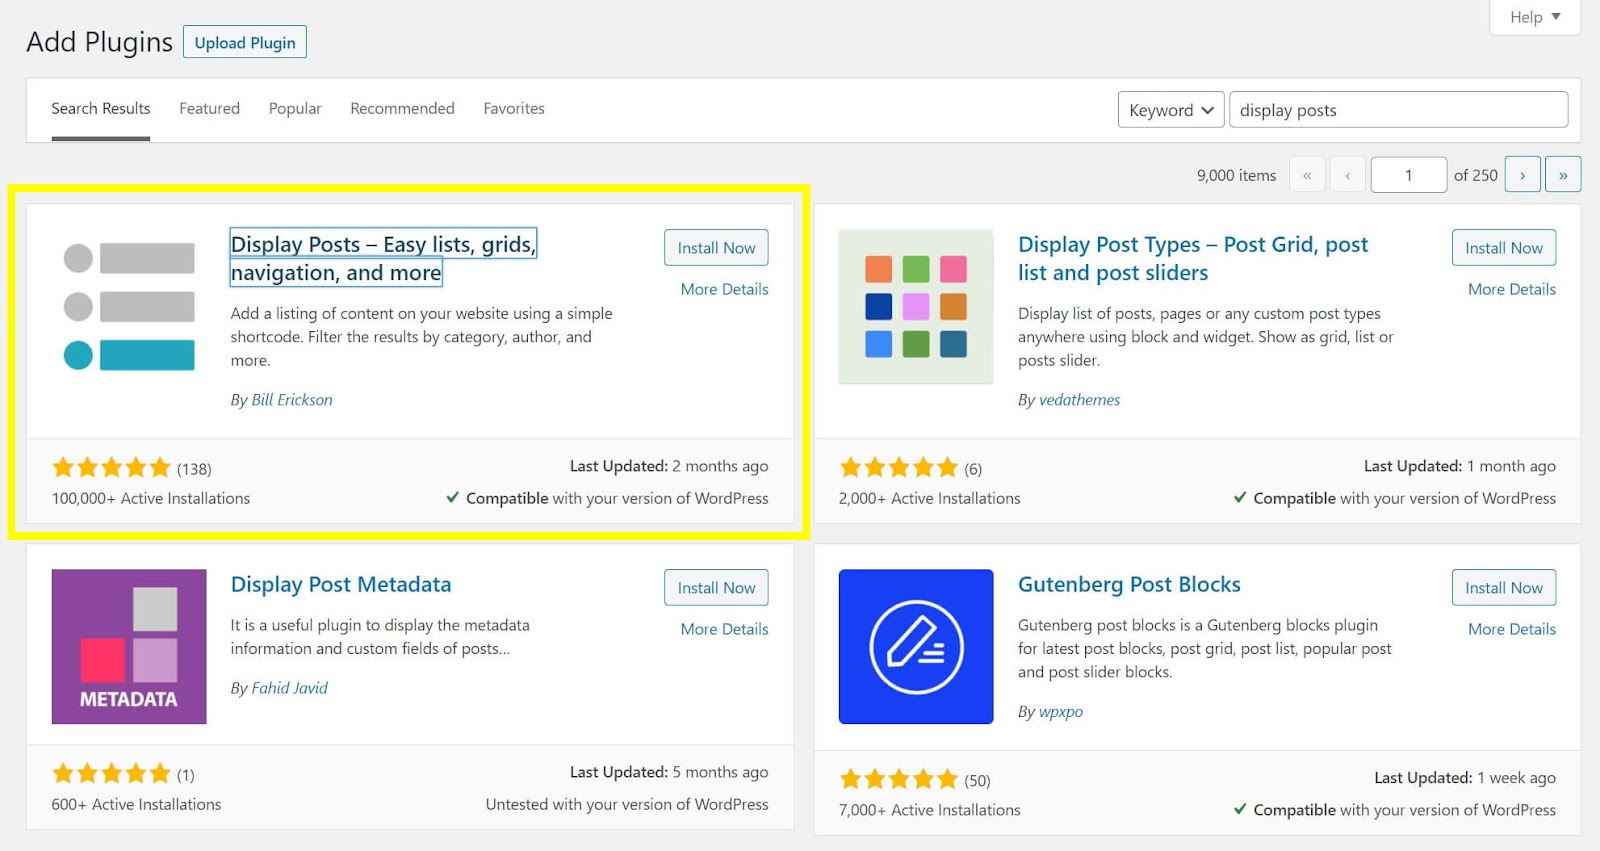
Step 1: Download the Display Posts Plugin
First, you’ll need to grab the plugin from the WordPress Plugin Directory. Head to your WordPress dashboard and navigate to Plugins > Add New. Search for “Display Posts” – it should be the first option available:
Click on Install, and then select Activate to complete the setup process.
Step 2: Add a Text Widget
The Display Posts plugin uses shortcodes to display the featured posts list. To add the list to a widget area such as the sidebar, you’ll need to use a text widget. Navigate to Appearance > Widgets, select the Text widget, and add it to the area where you want to display the list.
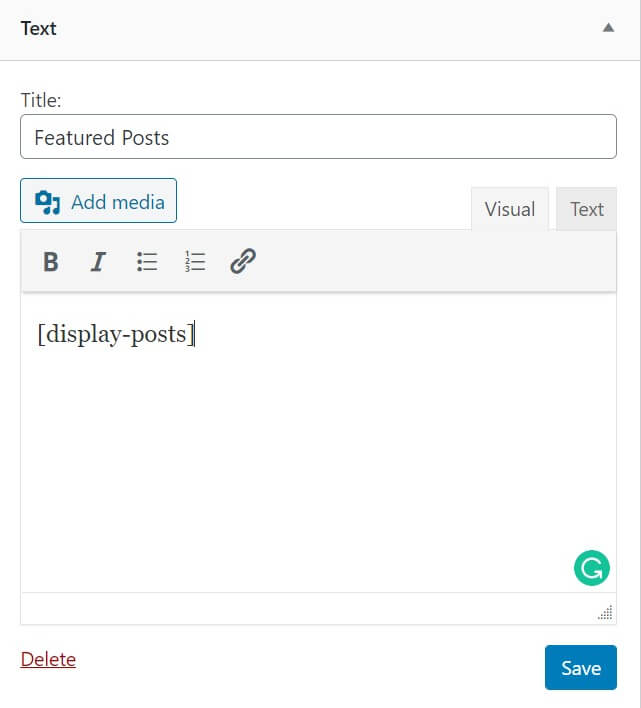
Step 3: Insert the Appropriate Shortcode
Finally, you can insert the appropriate shortcode to display your list. The basic option is the [display-posts] code, which shows a list of your most recent posts:
However, you can also add a variety of filters to the shortcode to alter the displayed posts. This way you can narrow down the list to posts from a single category, date range, and more. For example, [display-posts category=”news”] will only display posts from the “News” category.
An easy way to display the content you want to feature is to add a “Featured” tag to those posts, and then use the shortcode [display-posts tag=”featured”]. Display Posts’ developer provides a full list of query options – you can check it out to see all the different ways you can display and sort posts.
Keep Your Site in the Spotlight With WP Engine
No matter what type of website you’re running, getting your key content in front of users is crucial. Having a clear list of your most important articles, tutorials, and information drives traffic and pageviews, and can even improve the user experience on your site. A featured post list is an excellent way to make it easier for users to find this content.
If the user experience is your top priority, WP Engine can help. We offer world-class WordPress hosting and support that helps customers create amazing digital experiences for their users!